1. Drain the oil
In order to do this DIY, you must drain all of the oil from your engine. This is an excellent DIY to pair with an oil change!
2. Remove the intake
There’s a few clips around the filter box that need to be unclipped and one flat head screw (left arrow) holding the intake in. Once you have loosened the screw and un-clipped the filter box, you can then pull up on the intake and release it from the rubber grommet.
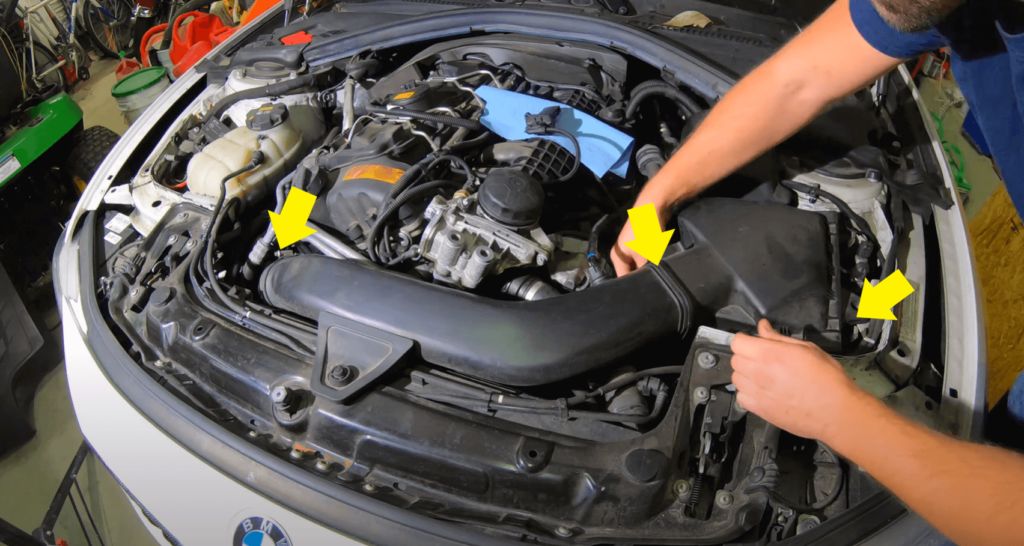
Fig. 1
3. Remove lines from oil cooler
Remove the 10mm and T30 bolt holding the lines in place. Once removed, you are ready to disconnect the lines. NOTE: A little oil will spill out so place a cup underneath the lines to keep oil from covering the front of the engine as you pull them down (red arrow).
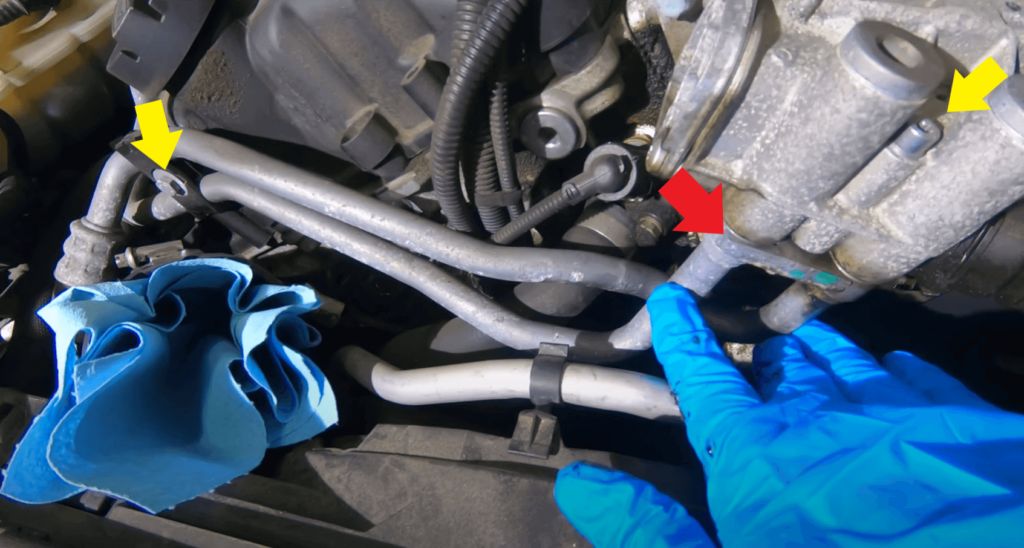
Fig. 1
Fig. 2
4. Remove Oil Cooler
Remove the 3 E12 bolts holding the oil cooler on the filter housing. Picture 2 shows the failed gasket. You see the oil leakage indicated by the arrow.
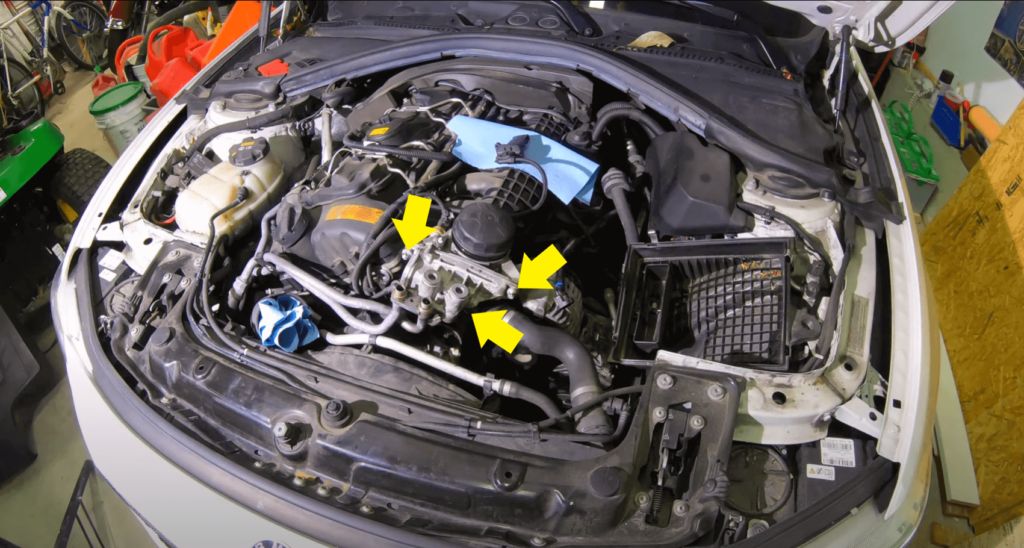
Fig. 1
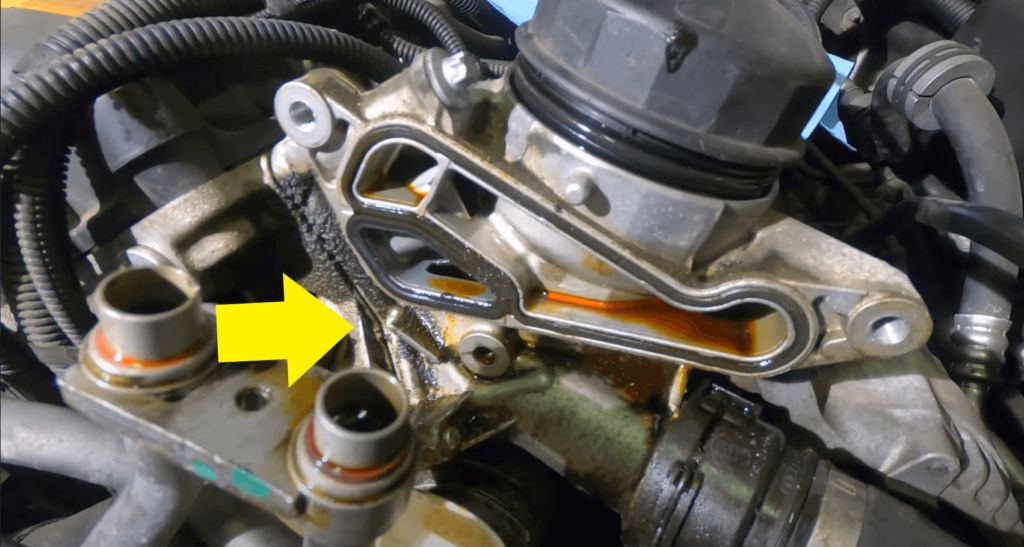
Fig. 2
5. Remove Coolant Line
Pull the tab on the connector of the coolant line and pull to release. If it is slightly stuck, try wiggling the connector back and forth to break it loose. If O-ring is flattened, this would be a good time to replace this as well.
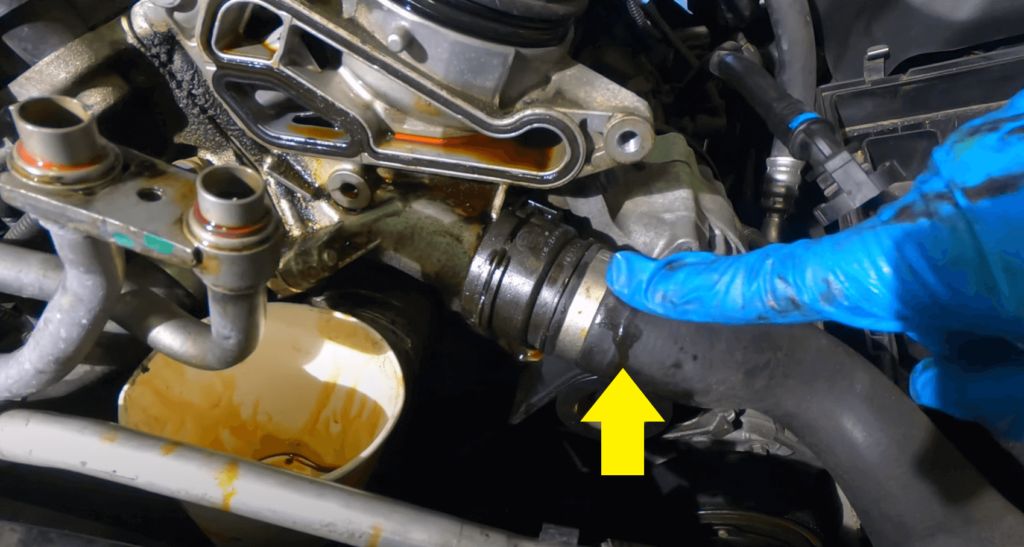
Fig. 1
6. Remove 7 fasteners holding intake manifold
In order to reach the top bolt holding down the oil filter housing, we must loosen the intake manifold and lift it off the engine roughly ~1 inch. This will give us enough clearance to the bolt we need. The 7 fasteners are marked with the yellow arrows. You will need to remove some of the foam on top of the engine to access the rear fasteners.
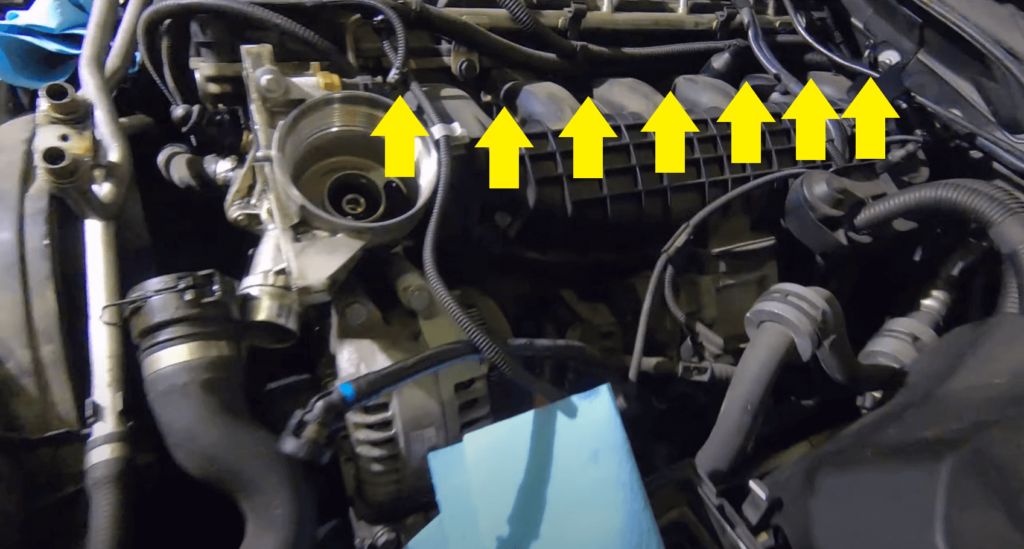
Fig. 1
7. Remove Oil Filter Housing
Now that you have access to all 3 bolts holding on the housing, remove them and pull the unit off of the engine. Hidden bolt marked with arrow.
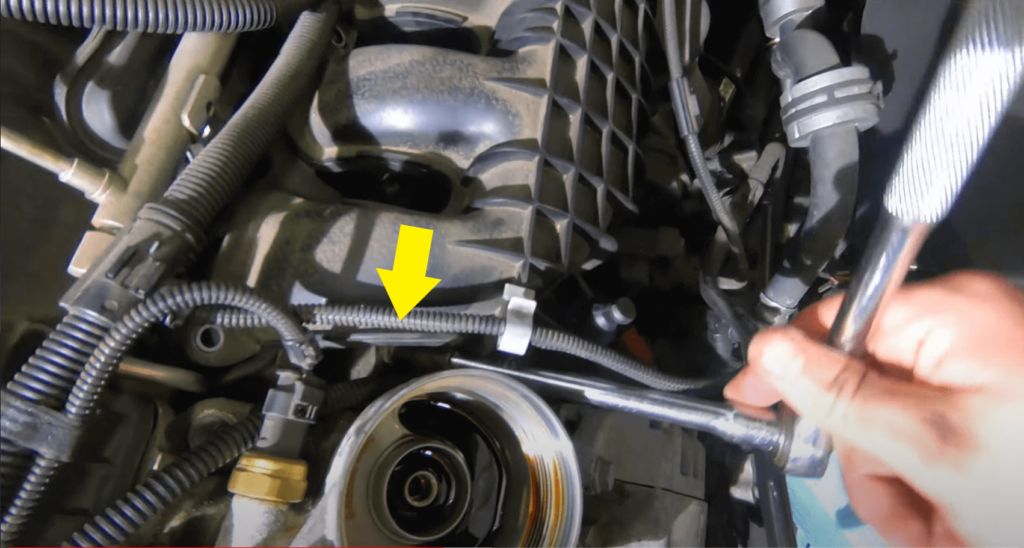
Fig. 1
8. Replace Gaskets
Using a pick tool or knife blade, remove both gaskets and replace. Using a small amount of oil on your finger, rub the gaskets to lubricate them before install. If you want, you can also replace any sensors on the housing during this time.

Fig. 1
9. Install parts in reverse order
Torque specs are in the description
10. Add oil and coolant
Refill your engine with the oil of your choice Top off your coolant and follow the BMW F3x bleeding procedure. (Shown in video)
N55 Oil Filter Housing Gasket Replacement
In this tutorial, we will be replacing the notorious n55 oil filter housing gasket. This is a common issue amongst BMWs and usually starts to occur around 80k miles+ With a basic set of tools, you can tackle this DIY and save yourself a lot of money as labor is the main cost driver in this repair. Torque Specs: Oil housing to engine – 22nm / 16ft lbs Oil cooler to oil filter housing – 15nm / 11ft lbs Intake manifold to engine – 15nm / 11ft lbs

over 1 year ago (Last Updated: over 1 year ago)